Note: This is an archived page. The instructions below are for Adobe Premiere Pro 1.5. Instructions for the current version can be found in our Premiere Export Tutorial.
Export Quicktime Files in Adobe Premiere 1.5
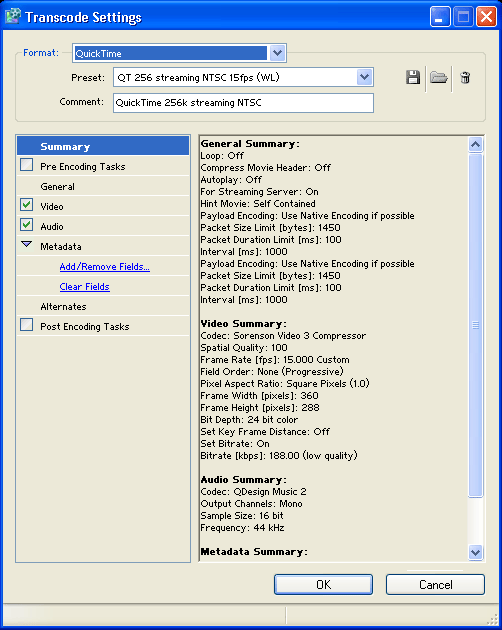
Place your video clip in the Premiere timeline. From the File menu, select Export > Adobe Media Encoder. The Transcode Settings window will appear:

From the Format drop-menu select Quicktime. The options and information in the rest of the window change to reflect this format.
From the Preset drop-menu select the preset which best matches your delivery platform. For example, if the file is going to be served from a web page to an audience with a connection of 256K or higher, choose something like QT 256 streaming NTSC.
To customize a preset or create your own, simply make a change to any of the options listed under Summary. You will be prompted to save the preset when you close the window. You can also add your own custom comment to describe the preset in the Comment field.
Metadata
Metadata fields allow you to enter optional details such as a title which will be recorded with the file.
Saving
When you're happy with the settings click OK. You will be prompted for a file name and location for the transcoded file. Quicktime files use the .mov extension.