Recording in Adobe Soundbooth
![]() Recording is quite straightforward in Soundbooth. To bring up the Record window, do any of the following:
Recording is quite straightforward in Soundbooth. To bring up the Record window, do any of the following:
- Click the red Record button at the botom of the Editor panel.
- Select File > Record from the main menu.
- Use the keyboard shortcut Ctrl(Cmd)+R.
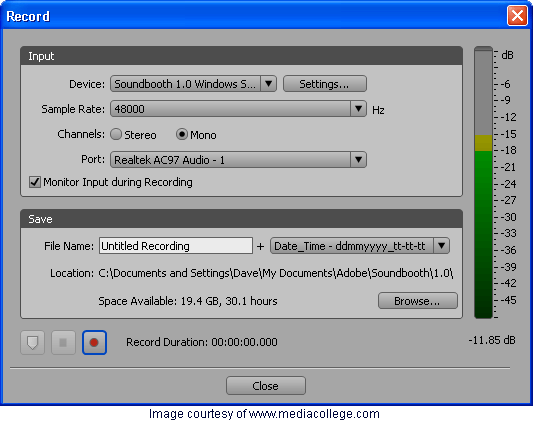
Select whichever device you prefer. If in doubt, the default should work fine.
Select a sample rate. 41000Hz is the minimum for high-quality audio. 48000Hz is better for video and television work.
Select stereo or mono. Only use stereo if you are actually recording a stereo source (e.g. a single human voice is always mono, so there's no point recording stereo).
The port menu lets you choose between the available sound card inputs. Again, the default should work fine.
Enter a file name for the recording session. Files will be saved with the additional information you specify (e.g. date/time, incrementing number).
Specify the location on your hard drive (or network) to save recorded files.
Click the record button to begin recording and the stop button to end.
Markers
The Markers button is a very handy feature that allows you to add markers as you record. This is great, for example, to mark points in a script or different takes.