Using Edit Software
Once you have captured your footage to your hard drive you are ready to start a new project and begin editing.
The Editing Workspace
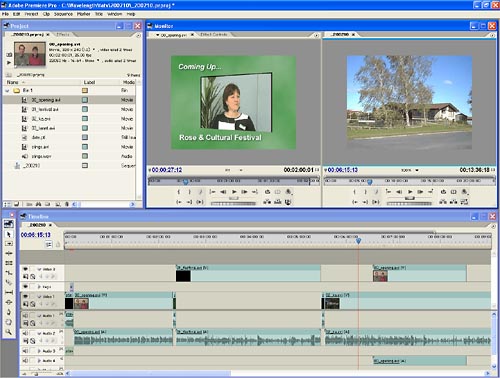
The screenshot below is from Adobe Premiere Pro. This shows the three basic work areas which are common to most editing software packages (although the exact terminology may vary):
- The Project Window
In the top left of the screenshot, this window contains all of the elements used in the current project (video clips, audio, graphics, etc). - The Monitor Window
Top centre and right, the monitors show the video you are editing. In this case, there is one monitor for the source and one for the master edit. - The Timeline
Along the bottom, the timeline represents the flow of the video project. This is where you insert video and other elements and arrange them as desired. When you output the video, it will play from the left to right and include everything on the timeline.
The simplest way to arrange elements on the timeline is to drag and drop them from the project window. You can then adjust the elements, for example, trim video clips to make them shorter or reduce the volume of audio clips. You can rearrange elements as much as you like and preview the results before finalizing them.
Any good software package will also allow you to add multiple layers of video, audio and graphics which can be mixed and superimposed to create various effects.
Remember, different software packages will look different to the example above. You really need to read your software manual to learn how to use it properly.
Next Page: Outputting Video