Make a Volume Meter in Adobe After Effects
This tutorial shows how to make a functioning volume meter that responds to the sound level of an audio track. Our example will be 100x300 pixels running at 15 frames per second, but feel free to vary the settings as required.
Create a new composition with these settings: 100x300 pixels, square pixels, 15fps.
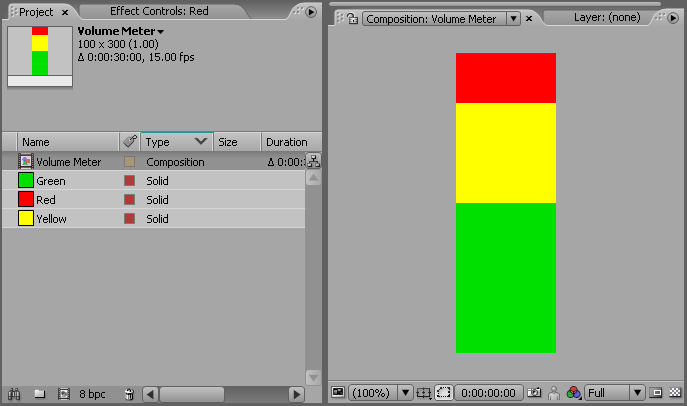
Import 3 solids with these colours and sizes: Red (100x50 pixels), Yellow (100x100 pixels), Green (100x150 pixels). Arrange them in the Composition panel like so:

Select the three solids, then select Layer > Pre-compose or Ctrl-Shift-C to bring up the Pre-compose window. Enter "VU" for the name and make sure the "Move all attributes into the new composition" option is selected. Click OK. Your timeline should now have one layer called "VU".
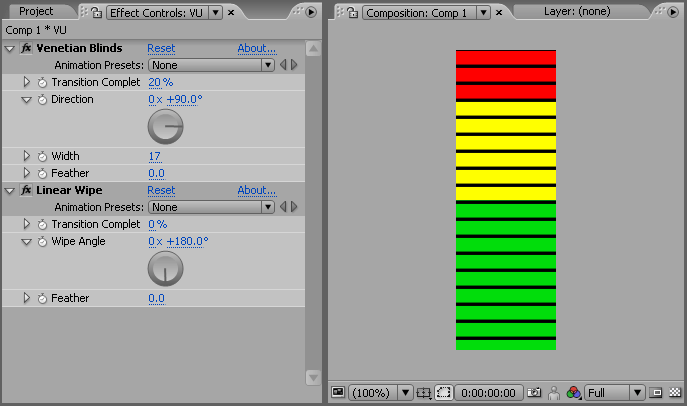
Select the VU layer and add a venetian blind effect (Effect > Transition > Venetian Blinds). Adjust the effect settings to the following: Transition Complete = 20%, Direction = +90°, Width = 17.
Now add a linear wipe transition (Effects > Transition > Linear Wipe). Set the Wipe Angle to 180°.
The effect should look like the example below (you can see the venetian blinds but the wipe isn't active yet). If you want to take this a step further, you could also add a vertical black line down the middle to make it look like a stereo meter.

Now we have the graphical part ready, we just need to make it move in time with the audio.
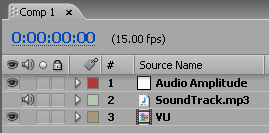
 Import a sound file and add it to the timeline (our example will be called SoundTrack.mp3). Right-click the timeline layer and select Keyframe Assistant > Convert Audio to Keyframes.
You will see a new layer called "Audio Amplitude" as pictured right.
Now we need to expand some of the layer controls using the small triangle arrows.
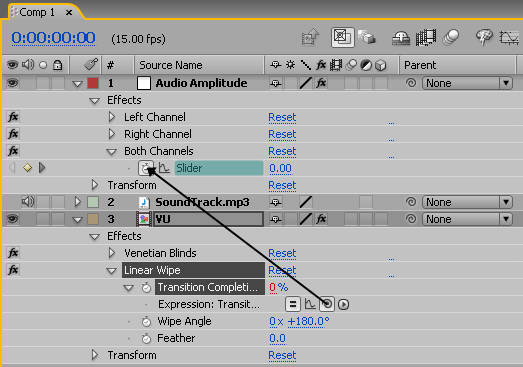
In the Audio Amplitude layer, expand Effects then Both Channels.
In the VU layer, expand Effects then Linear Wipe. Alt-click the stopwatch next to Transition Complete, then click and drag the pick whip onto the stopwatch next to the slider like so:

In the Transition Complete layer a new expression will appear:
thisComp.layer("Audio Amplitude").effect("Both Channels")("Slider")
Click on the expression so you can edit it, then add: *-5+100 so it looks like this:
thisComp.layer("Audio Amplitude").effect("Both Channels")("Slider")*-5+100
That's basically it — preview the effect to see how it looks. If the meter movement is too much or too little adjust the number we added in the expression, e.g.:
*-8+100 will create more movement,
*-2+100 will create less movement.
Done — Export the file and add it to your video project!