Step 1: Create the Layers
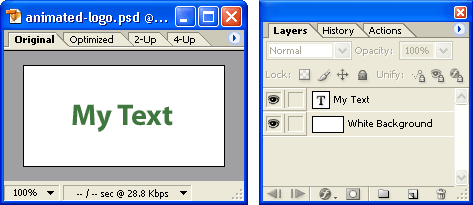
The first step is to create multiple layers, each of which will become a separate frame in the animation. Let's start with a very simple image consisting of a plain white background and a layer of text which we want to animate. We will animate the text so it starts above the image frame and moves down to end up in the middle.
Note: Layers can also be shared between frames — in this case the white background layer will appear in all frames.
We will create five extra layers so the animation will be six frames long. We will work backwards, creating the frames from number five to number one.
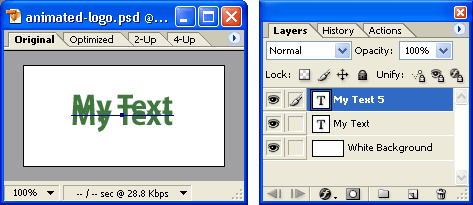
Right-click the "My Text" layer in the layer palette and select Duplicate Layer. A new layer is created called "My Text copy". Double-click the layer name and rename it "My Text 5".
Choose the move tool ![]() from the toolbox. Make sure the "My Text 5" layer is still selected, then hit your up arrow several times until the text moves slightly upwards. In this case we hit the up arrow 12 times — you can see the result with both layers visible:
from the toolbox. Make sure the "My Text 5" layer is still selected, then hit your up arrow several times until the text moves slightly upwards. In this case we hit the up arrow 12 times — you can see the result with both layers visible:
Repeat this process, i.e. create a duplicate of "My Text 5" called "My Text 4" and move it upwards the same amount. Keep repeating the process until you have a total of six text layers plus the background. Eventually you will have an image file which looks like this:
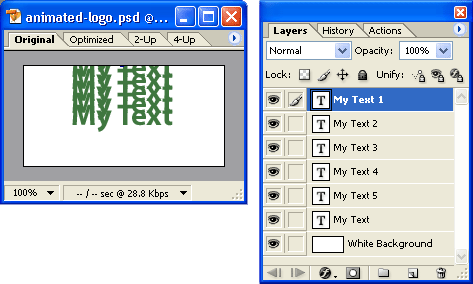
You can view individual layers by clicking (deselecting) all the eye icons in the layer palette except the one you want to see. View one layer at a time to see how the animation will unfold.
Next Page: Frames