Audio Sequencing Workshop: Editing
What is editing? Editing is cutting and re-arranging parts so they fit properly into the song arrangement. We will also have to cut out unnecessary parts to get a cleaner sound. We should work non-destructively: this means everything we are doing can be undone. This is necessary if changes are unwanted later on.
The most important tool in the edit process is cutting and fading. We need this to put two regions in a line or to fade in/out a part smoothly. Here are 3 ways to do this.
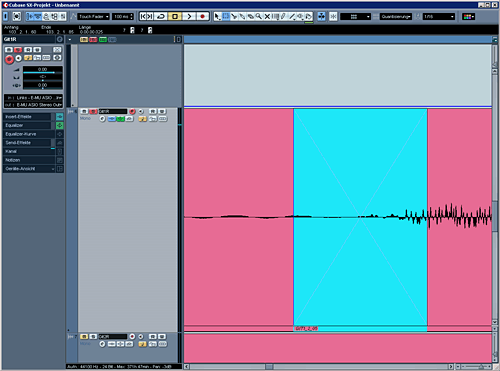
Cutting At Zero Crossing
How you do it wrong:
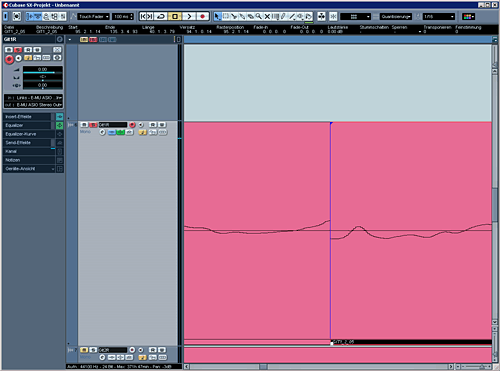
The 2 parts were put together in no zero crossing-case. Your loudspeaker will try to make an infinite huge move which will result in a crackle.
The right way:
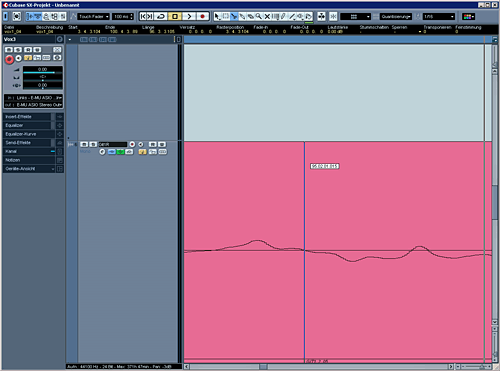
The cut was proceed on the zero crossing of the curve. If we put together 2 parts, which were cut at the zero crossing the transition will sound good.
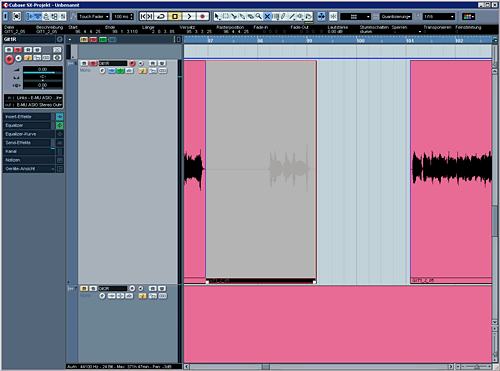
Fade In/Out
If you want to fade-in/out a track you can either use the region-fades or the volume-fades.
The longer the fade the smoother it sounds.
The region-fade:
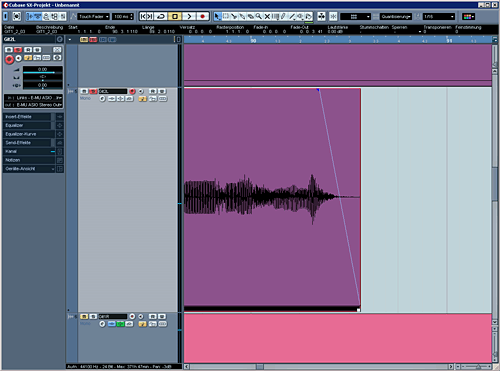
The volume-fade:
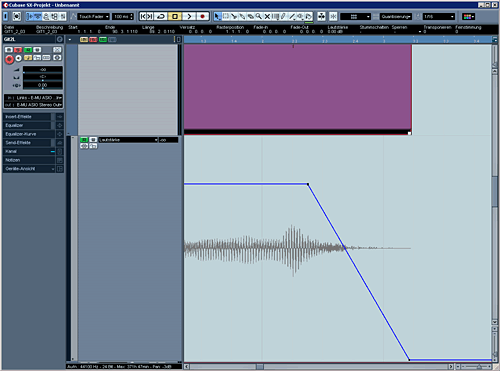
The main-difference between the region-fade and the volume-fade is that the volume-fade is post-insert, which means that the volume is being controlled after the inserts. If you chose region-fades the more the volume is being decreased, the less signal comes to the insert, which can colour the sound. Therefore an easy to understanding rule:
"Dynamic in the insert of the audio-track – Use the volume fade!".
The volume fade is found in the Automation submenu.
Crossfades
The fastest way to put together two parts is using the crossfade (do this by overlapping two regions and mark, then audio>crossfade.) Here it's automatically created a fade out and a fade in which are overlapping on the region you marked.
We have to be careful, though. If the crossfades are too long it will sound whammy and imprecise. When the crossfade is too short the change from one part to another can sound untight or wrong.
Removing Silence And Mute Regions
Parts of audiotracks with no useful information can be deleted. No one wants to hear sneezing a singer in a break, he/shes waiting to sing again. Or guitar crackling etc is not needed.
Make a cut, then mark the region and delete or mute it. This is really important if you have a drumset. The parts where the toms aren't played can be muted, so we get a cleaner sound. It's the same effect like a noise-gate, but handmade we can control the parameters (hold, attack etc.) much better.
Muting and cutting clean:
Cleaned Tom track:
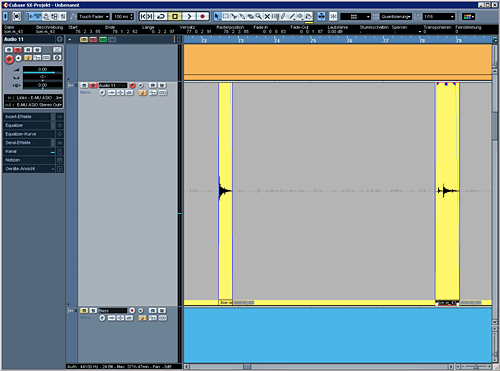
(Don't forget the fade-ins and fade-outs!)
Our arrangement should now, after the editing, look like this:
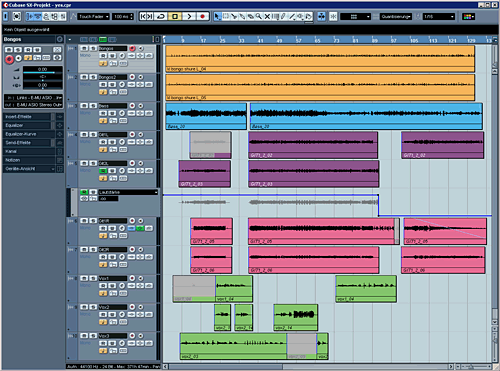
Actually we cleaned the tracks. Even now it should sound better because we removed all unnecessary information. We can also cut the single vocals parts and rearrange them. For creating remix-version it's also really important to know how to edit properly.
Next Page: Mixing