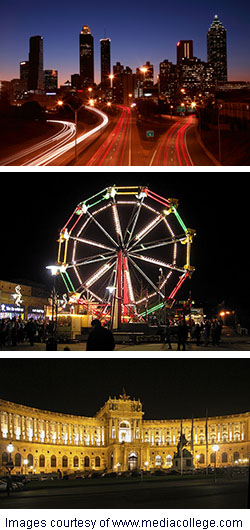
Night Photography

With night photography, what you see is definitely not necessarily what you get. The usually simple shots of objects can suddenly become enveloped in a kaleidoscope of coloured light, and the light sources themselves (streetlights etc.) will become brilliant spots of light.
If you’re using a digital camera, you will have the advantage of being able to review each shot to make sure your exposure is just right, and you can take advantage of the amazing colour shifts that the different light sources provide.
You will need a fairly new digital camera that allows you to take long exposures. Older digital cameras tend to create “digital noise” when exposures became too long. Most new digital cameras have noise reduction technologies built in, such as luminance control and dark frame subtraction. Dark frame subtraction entails the camera immediately recording a second exposure after the first, but without opening the shutter. The noise is then removed leaving a clean night shot.
Remember to make sure you have a good tripod. Also, try an off camera flash for different effects. Your camera, because long exposures and constant viewing of your LCD monitor will use plenty of power. Carrying a small flashlight can be useful for seeing your camera’s dials and buttons in the dark.
Set your camera to manual exposure mode, and set your f-stop to about the middle of its range. Begin at a one-second exposure for the first test. Many cameras will automatically turn on noise reduction when exposures are long. If you have to manually turn on noise reduction, do so. Set the ISO setting to the slowest speed to minimize digital noise. Also, begin by setting white balance to auto; you can adjust that setting later when you see how your camera reacts to different kinds of light. If your camera has a hard time focusing, you can switch your camera to manual focus.
Shoot a few test exposures, beginning with a full second exposure and f-stop set midway. If the photos are underexposed, increase the length of time the shutter is open and open the lens a stop or two. Alternatively, if your first shot is way overexposed, close the aperture down to f/8 or more if your camera allows, and reduce the shutter speed. If you reach the maximum exposure time your camera is capable of, and still need more light, you can increase the ISO speed of your camera.
Another method when you shoot long exposures at night is to “paint” light into your picture. Take a flashlight, and after your exposure begins, shine the beam around areas you want to lighten up; the additional exposure will brighten those areas. If you cover your light with a coloured filter, you can add rich, saturated accents as well. You can also add light with a flash unit; just walk around during your long exposure, and manually pop it at parts of your scene - Each flash will be recorded in the long exposure. You can even walk around in full view of your camera’s lens during a long exposure adding light here and there, and if you wear dark clothes, you won’t even show up in the final picture. Lightly coloured cellophane or lighting gel material will let you add a touch of colour wherever you choose to shine your coloured light.
Some final tips
- Light your subject from beneath
For added drama to your photographs, try shooting from beneath. Motion can be an advantage here; longer shutter speeds will exaggerate the motion to create some interesting effects. - Shoot the moon
The moon might hide beneath a cloud or change size, but photographing the moon, especially when it plays with the moisture created in clouds illuminated by the moon - can provide you with some amazing shots. Try catching the reflection of the moon off the water, or experimenting with colour changes in Photoshop.
Summary
In conclusion, the main points to consider when shooting at night are:
- Surrounding light sources
- Digital camera with noise reduction technology, Dark frame technology and luminance control.
- Try an off camera flash
- Manual exposure – F-stop to middle
- Try painting light into your picture using a flashlight