Step 1: Create the Layers
The first step is to create multiple layers, each of which will become a separate frame in the animation. You may be able to create only two layers and have Photoshop automatically animate them, but more likely you will want to create a number of layers and do much of the work yourself.
Let's start with a very simple image with two layers. The white background layer will appear in every frame of the animation. The second layer contains a shape that we will animate from left to right.
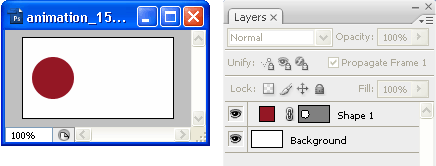
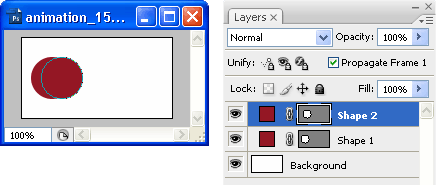
We will create eight extra layers so the animation will be nine frames long. Right-click the "Shape 1" layer in the layer palette and select Duplicate Layer. A new layer is created called "Shape 1 copy". Double-click the layer name and rename it "Shape 2".
Choose the move tool ![]() from the toolbox. Make sure the "Shape 2" layer is still selected, then hit your right arrow several times until the shape moves slightly to the right. You can see the result with both layers visible:
from the toolbox. Make sure the "Shape 2" layer is still selected, then hit your right arrow several times until the shape moves slightly to the right. You can see the result with both layers visible:
Repeat this process, i.e. create a duplicate of "Shape 2" called "Shape 3" and move the shape the same amount. Keep repeating the process until you have a total of nine shape layers plus the background:
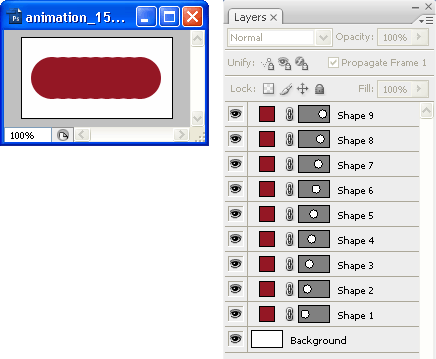
In this case you can see how the animation will unfold in the layer displays (the shape icon moves a little to the right in each layer). At the moment it's all just one picture though — we need to make each layer into a frame.
Next Page: Frames