How to Create a Transparent Background in Photoshop
This page demonstrates how to use Adobe Photoshop to create a transparent background.
The file will need to have a transparent layer, which can be achieved in two ways...
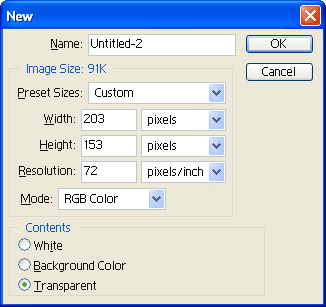
(1) Create a New Transparent FileSelect File > New from the menu. A window opens like the one pictured right — this includes the option to make the file transparent. Once the new file has been created, add your image content to one or more new layers. This will happen automatically if you copy and paste an image into the file. (2) Add a Transparent LayerYou can add a transparent layer to an existing file by selecting Layer > New > Layer from the menu. The new layer will be added above the currently selected layer. Drag the new layer below the image's layer. |
 |
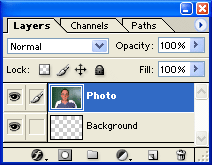
Whichever method you use, you should end up with at least two layers (as shown right). The image content is on one layer, positioned above the transparent background layer. Notice how the transparent layer is checkered. This pattern is not part of the image - it is just there to help you identify transparent areas. Make sure the content layer is selected before you continue. |
 |
Making the Transparent Area |
|
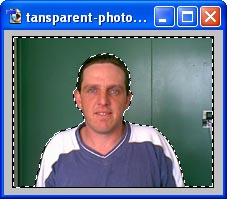 |
Using the magic wand or lasso tool, select the area of the image you want to be transparent. You may want to experiment a few times with the tolerance and anti-aliasing settings to get the best selection. In the example shown here, the following Magic Wand settings were used: |
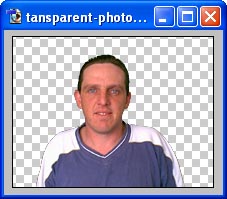 |
Hit the Delete button. The selected area is removed and the checkered (transparent) background becomes visible. |
Now that you have a transparent background you can save the file in a variety of formats, including GIF, TIFF, PNG and of course PSD.
Notes:
- JPG format does not support transparency.
- If you find ugly edges around the image when you place it against a different background colour, see this solution.
- If you have any questions please ask in our Graphics Forum.