Keyframes in Adobe Premiere
Keyframes are used to change the properties of a video or audio effect over time. Almost any effect can use keyframes; for example, volume, opacity, scale, position, colour balance, etc.
The idea is to create more than one keyframe, then set the desired effect values at each keyframe. Premiere will create a gradual change in values between keyframes (this is known as interpolation). For example, you could create a keyframe where the volume is -20dB and another keyframe 5 seconds later where the volume is 0dB. Premiere will interpolate this to create a smooth five-second volume increase.
There are two ways to view and work with keyframes: In the Timeline and in the Effect Controls window.
The Timeline
Keyframes can be displayed in the timeline when a video track is expanded. A line is shown with small diamonds marking the keyframes like so:

This is a relatively easy, intuitive way to view and manipulate keyframes. On the downside, keyframes can only be shown for one effect at a time and control is not as precise as using the Effects Control window.
For more information see Keyframes in the Timeline.
The Effects Control Window
For full control over keyframes, select the clip in the Timeline and open the Effects Control window (Window > Effect Controls).
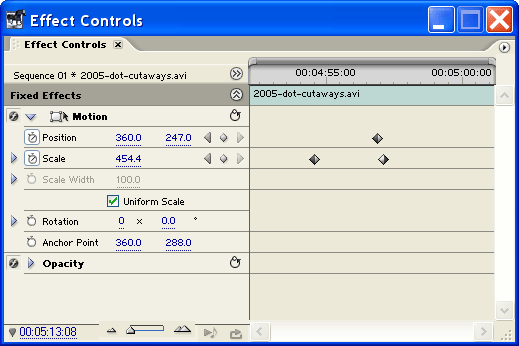
The right-hand side of the window is a miniature timeline, just for the selected clip, which shows keyframes as diamond icons. Although it takes a little getting used to, this view allows you to see keyframes for all effects at once and provides excellent control.
For more information see Keyframes in the Effect Controls Window.