Step 2: Create the Animation Frames
Now that you have created the layers needed for the animation, you need to create the frames. If the Animation window isn't showing, select Window > Animation from the main menu. In the Layers palette, deselect the eye icon in all layers except "Shape 1" and the background. You should see something like this:

You can see one frame in the Animation window with the "Shape 1" layer visible.
Note: If you are using Photoshop Extended, you also have the option to view the Animation palette in timeline mode. This is a great function but we will leave it for now and use the simpler frame mode.
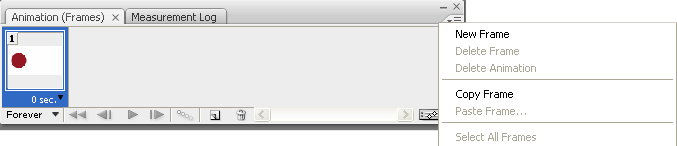
Click the small arrow icon near the top right of the Animation window to open the flyout menu. Click New Frame.
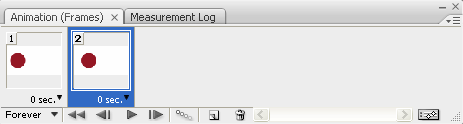
A new frame will be created and added to the window like so:
With the new frame selected, go to the Layers palette. Deselect the eye icon for the "Shape 1" layer and select the eye icon for "Shape 2". You should see something like this:
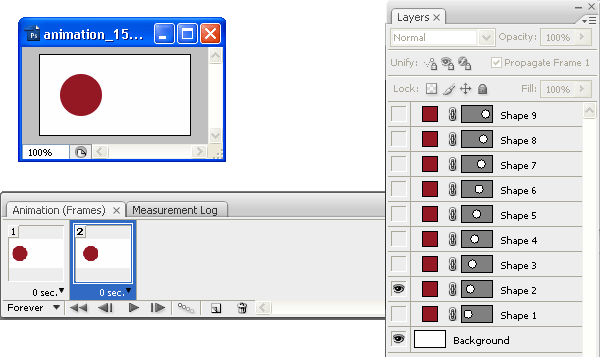
The first frame still shows only the first shape layer while the second frame now only shows the second shape layer.
Keep adding frames and making the corresponding layers visible until you have nine frames. It should look like this:
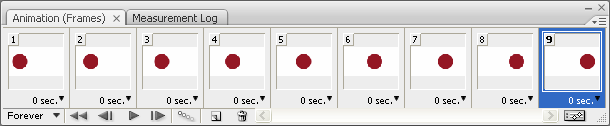
You now have all the layers and all the frames needed for your animation.
Next Page: Timing