
Highlight Part of an Image in Premiere
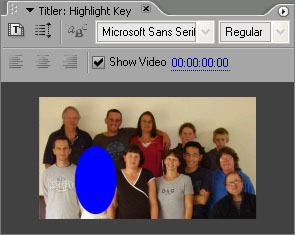
This page demonstrates the use of keying to highlight part of an image in Adobe Premiere Pro. The goal is to darken the whole frame except for the area we want to highlight. This effect is often used to identify one subject in an image containing multiple subjects, as per the example on the right.
Instructions
Place the video clip on the timeline.
 With the Current Time Indicator over the clip, create a new title.
Select Show Video so you can see the clip below the title.
Using one of the titler's shape tools, create a shape to become the highlight area. Our example uses an ellipse.
In the Title Properties window, set the Fill colour to pure blue (hex colour 0000FF).
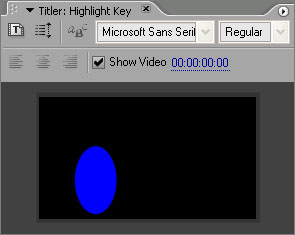 When you are happy with the size and position of the shape, create a new black rectangle shape that covers the entire frame. This will become the darkened area.
Right-click the shape and select Arrange > Send to Back. This places the rectangle behind the highlight shape.
Place the title in the timeline on a track above the video clip. Adjust the opacity of the title until the dark area has the right amount of transparency (about 50% should be okay — you can tweak it later).
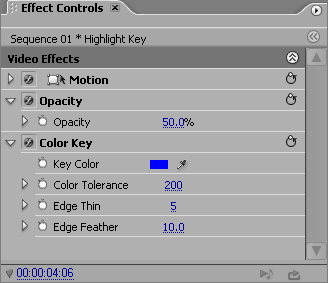 Apply the Color Key effect to the title (Effects > Video Effects > Keying).
Select pure blue (0000FF) as the key colour.
Adjust the Color Tolerance, Edge Thin and Edge Feather until the highlight looks right. The example settings shown here should work in most situations.
If necessary, fine-tune the shape and opacity of the highlight.