How to Batch Rename Files in Windows XP
To illustrate this process we'll use an example of 15 digital photo files, in which the first 8 were taken at a picnic and the others were taken somewhere else. We'll rename the first 8 files to identify them as being from the picnic.
Using My Computer or Windows Explorer, open the folder containing the files. Select all the files you wish to rename (use Shift or Ctrl to select multiple files).
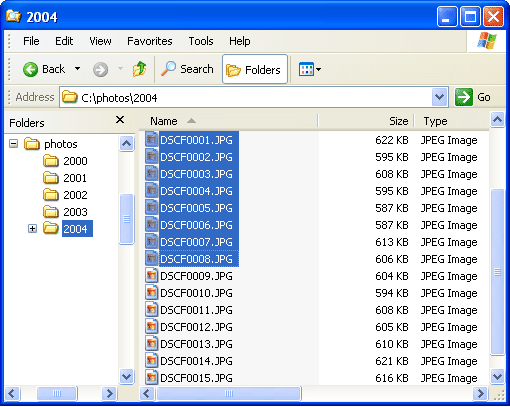
Note: In this example the files are already numbered sequentially - this is how digital cameras create temporary file names. We still want to create a numbered sequence, but we want better names.
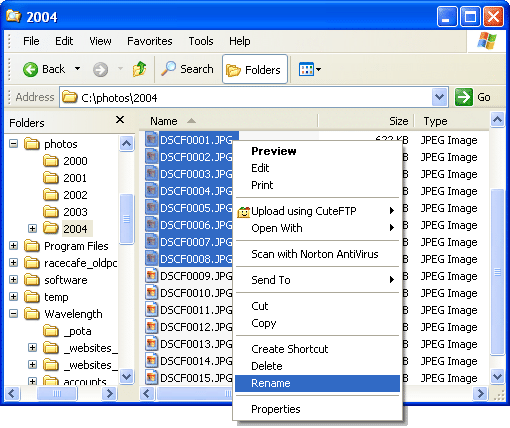
Right-click on the first file in the list and select Rename from the context menu.
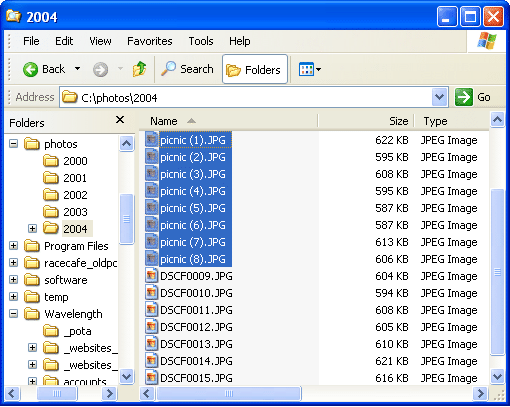
Type a new name for the file, then hit Enter. We'll call the first file picnic.JPG - the other files will automatically be given the same name followed by numbers in parentheses.
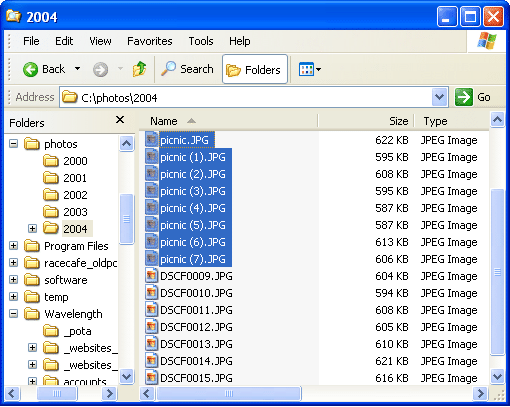
You'll notice that the first file has the exact name you entered, without a number. If you want the numbering to start from the first file, enter the file name followed by the number (1). You must enter it exactly like this - the file name, a space, and the number 1 in parentheses.
Note: If you make a mistake, you can undo the renaming by selecting undo from the edit menu, or by pressing Ctrl-Z (repeatedly).
Summary
This is a nice simple batch renaming system, but it is quite limited. You can't change the numbering system and you're stuck with the spaces and parentheses. Also, you can't change the case of the file extensions (so in the example above you're stuck with upper-case JPG).
This system will suffice for many people, but if you need more control over the renaming process you'll have to use a specialized utility or other software.
Important: If you plan on using these files on the internet, this renaming system is not a good idea as spaces in file names will cause problems.