Exporting Video from Adobe Premiere Pro
This section shows how to export video clips using Adobe Premiere Pro. You can export in a variety of formats and it's important to choose the right one for the job.
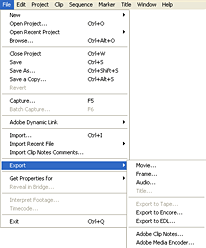
Export options can be found in the menu under File > Export.
Important: Before exporting, make sure you have the correct panel and source selected in the workspace. For example, select the timeline panel to export the timeline, or select the preview monitor to export a clip shown there. If the export option is grayed out, you don't have a clip or timeline selected.
AVI
To export as an AVI file, choose File > Export > Movie.
This creates a large file but is the best quality. Use this option for mastering purposes or if you want to be able to edit the video later. For maximum quality, export as an uncompressed AVI (warning: very large files will result!)
DVD
For output to DVD, choose File > Export > Export to Encore. This sends the selection to the separate Encore application for DVD authoring.
Adobe Media Encoder
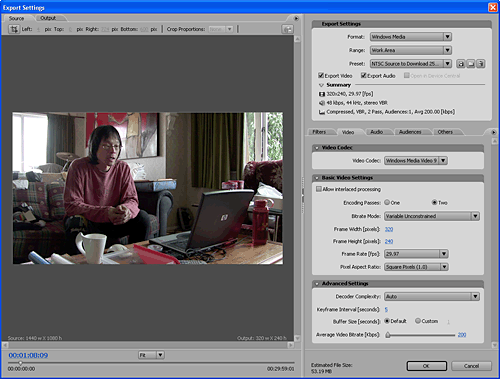
To export to a different format, choose File > Export > Adobe Media Encoder. The Export Settings window opens:

Choose a format from the drop-menu at the top right of the window. You can exports as: Flash, Windows Media, Real Media, Quicktime, and a variety of MPEG formats including Blu-ray and H.264.
These options are more compressed, so they are smaller file sizes and lower quality. Use these options for serving files on the Internet, mobile devices, or for minimizing storage requirements on disk.
The options for each encoding format are very similar. Choose the format you wish to use for more details:
Windows Media | Real Media | Quicktime | Flash
See also: