Setting Up a Camera Tripod
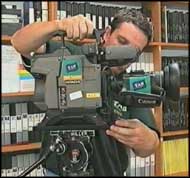
The example below shows a Miller tripod with 2-stage legs and fluid head. This is a mid-range professional tripod. Most consumer tripods have fewer or simpler features but the principles are the same.
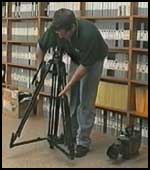 Spread the
tripod's legs, and adjust the spreaders (if you have them). Release the tensioners on the
legs, and extend the legs to the desired height. Spread the
tripod's legs, and adjust the spreaders (if you have them). Release the tensioners on the
legs, and extend the legs to the desired height.
If you are working in high winds, you can anchor the tripod by placing sandbags etc against the legs or on the spreaders. Many tripods have mid-level spreaders, positioned halfway up the tripod legs. These can be easier to work with on uneven surfaces. If the spreaders are hindering your set-up, you may be able to remove them. |
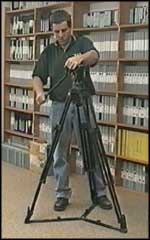 Adjust
the pan/tilt handle to the preferred angle. The handle is typically operated with the
right hand, while the left hand operates the camera functions (focus, iris, etc).
Experiment with different angles to find which is most suited to you. Adjust
the pan/tilt handle to the preferred angle. The handle is typically operated with the
right hand, while the left hand operates the camera functions (focus, iris, etc).
Experiment with different angles to find which is most suited to you.
You may wish to attach accessories to the handle such as a remote zoom or focus control. If so, you'll need to think about where they will be positioned. Remember that these will tie you to the tripod so you won't be able to quick-release the camera. |
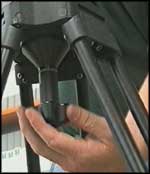  Below the head there is a screw which loosens the head so you can adjust the level. If the head has a spirit level, you can use it as a guide. Below the head there is a screw which loosens the head so you can adjust the level. If the head has a spirit level, you can use it as a guide.
Remember, it's what's in the viewfinder that counts. Some shots may need to be shot an a slight angle in order to appear level. On the other hand, some shots can be made more appealing by purposely adding a tilt. |
Plates
The idea is that any two plates (from any tripod and any camera) can be screwed together. It doesn't always work that easily but most professional cameras and tripods are compatible. Position and screw the plates together at a point which will provide the best balance for the camera. This will usually be near the middle of the baseplate, unless your camera is very front or back-heavy. |
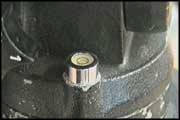
 Fit the plates to the head. There will usually be
some form of quick-release mechanism which the tripod plate locks into. You should feel a
reassuring click. Fit the plates to the head. There will usually be
some form of quick-release mechanism which the tripod plate locks into. You should feel a
reassuring click.
Fit the camera to the baseplate. This happens in much the same way as the tripod plate fits to the head, with a quick-release mechanism. Again, make it click, and give the camera a bit of a shake to make sure it's secure. |
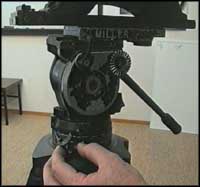 Adjust the pan and tilt tensions. This head has four
graduated tension settings, from no tension to heavy tension. Other heads may have
different options, including continuously variable adjustments. Adjust the pan and tilt tensions. This head has four
graduated tension settings, from no tension to heavy tension. Other heads may have
different options, including continuously variable adjustments.
Experiment with different settings. In general, use lighter tension for close or fast-moving subjects. Use heavier tension for slow moves, longer zooms, or if you're having difficulty keeping the shot steady. There should also be pan and tilt locks, to prevent the camera from moving at all. Use these whenever you're not operating the camera. |
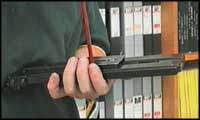 Professional cameras and tripod heads both come with a plate. The camera plate (baseplate) attaches to the bottom of the camera, the head plate attaches to the top of the head. The two plates are screwed together, thus connecting the camera to the tripod. In the example pictured left, the long baseplate goes with the camera and the small plate goes with the tripod.
 Once you've turned the camera on, check your framing and make further
height/balance adjustments as needed.
Once you've turned the camera on, check your framing and make further
height/balance adjustments as needed.
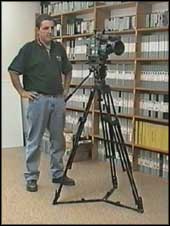
Make sure the tripod legs are positioned so that you'll be able to stand comfortably, and move around as much as you need to. Remember that if you're going to be panning or tilting, you should end the move in the most comfortable position.
It takes practice to be able to set up a camera quickly. Once you've done it the first time, and you're happy with your setup, take note of the tripod height and other settings. Next time, remember these things before you begin, and it will happen faster.
Next Page: Using the Tripod