JPG Options
This is part of the Photoshop "JPEG Options" window. It appears when you save a file as jpg.
Notice this window gives you an estimate of the resulting file size and the download time for the specified internet connection speed.
This is where we compress the JPG file.
The compression option usually appears when you save a JPG image, although it may not be labelled as such. You will usually see a window which says something like "JPEG Options" or "Image Quality". Typically this will include a sliding scale, perhaps 1 to 10 or 0% to 100%. If you save the image and this option doesn't appear, try selecting "Save As" and saving with a different file name. If you still don't get the option, consult the program's help file and search for "compression" or "image quality".
The higher the selected image quality, the larger the file size. The key is to find the lowest setting which retains an acceptable quality. We recommend saving several versions with different compression settings. Then starting with he smallest file, look at each one and choose the first file which is acceptable quality.
Note: When altering the compression setting, the change may not be apparent until you open the file next time.
Example
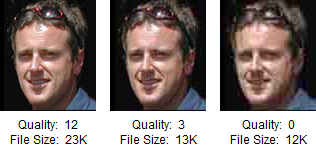
The close-up image below has been saved with three different compression settings, with 12 being the highest quality and 0 the lowest.
As you can see, the drop from 12 to 3 has reduced the file size by almost 50% with no significant degradation. You will also notice the drop from 3 to 0 degrades the image a lot, but hasn't reduced the file size much further. At this point the trade-off is no longer worth it so we would normally stick with the 13KB version.
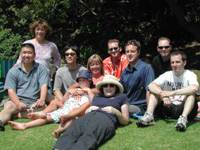
The original version of this photo was 2048x1536 pixels. Reducing the quality setting from 10 to 3 drops the file size dramatically - from 966KB to 276KB.
Next Step: GIF Options